

How do you celebrate 4th of July? Some people put together patriotic outfits. Many watch fireworks of some kind. And I’d venture to guess that everyone who celebrates 4th of July does it with food. Hamburgers and hot-dogs. Coleslaw and potato salad. Desserts with strawberries and blueberries. There are so many options! This is not a story about any of those. This is the story about a humble cake whose insides reveal an awe-inspiring surprise.
For the past few years our 4th of July tradition has been to go away with friends to a remote lake far outside NYC. Because most of us live in a world where the kitchens are tiny and our time is limited, this vacation is always filled with games, sports and swimming. It is also filled with cooking and baking– new and adventurous recipes we never have time to test in our daily lives. This is where I first learned about this cake.
When my friend who introduced me to this cake told me about it I was confused. The cake seemed impossible. It defied logic. I didn’t understand the theory of how it could possibly work. Especially with 2 home bakers attempting it for the first time. But in spite of some structural issues and a lot of frosting glue, the cake was a huge success.
This year we were not able to join our friends for the 4th so I decided to attempt the cake again. This time, with a year of additional experience, some well-researched recipes, and a new audience to shock and awe. This post is not about the recipe. I spent a lot of time doing my research, and I feel like I made the right choice cake and frosting recipe-wise. I knew that I needed a white cake that would take food coloring without having to remember color theory. I also knew that I needed a denser cake than last year. One that could handle being turned into very thin layers without falling apart. And I needed a fluffy and light frosting that would be delicious enough to cover up any mistakes and delicate enough to physically do the same. Research led me to this recipe on the Sweetapolita blog. I doubled the cake recipe and 1.5x the frosting (though I think 1 frosting would have been enough as I had a lot left over.
So let’s get to it! How do you make a hidden flag cake? The first thing you have to do is bake the cakes. The recipe made two 8 inch round cakes so I just doubled it to make a total of 4 cakes. You will have to color the batters. I used a gel based dye because they add less artificial flavor to the cake than a powder or liquid based dye. I ended up just making the recipe twice rather than making a giant batch of batter. I did this for a few reasons. 1- The only mixing equipment I had was an electric mixer from the 1960’s that made very sad noises when it had to mix thick batters. 2- I had three different colors of cake to make and the thought of trying to eyeball how much batter to use for each was too daunting. 3- I didn’t know if doubling cake recipes is as easy as just multiplying everything by 2 and didn’t want to risk that it wasn’t. So at the end of the day, you need 2 red cakes, 1 blue, and 1 white cake. 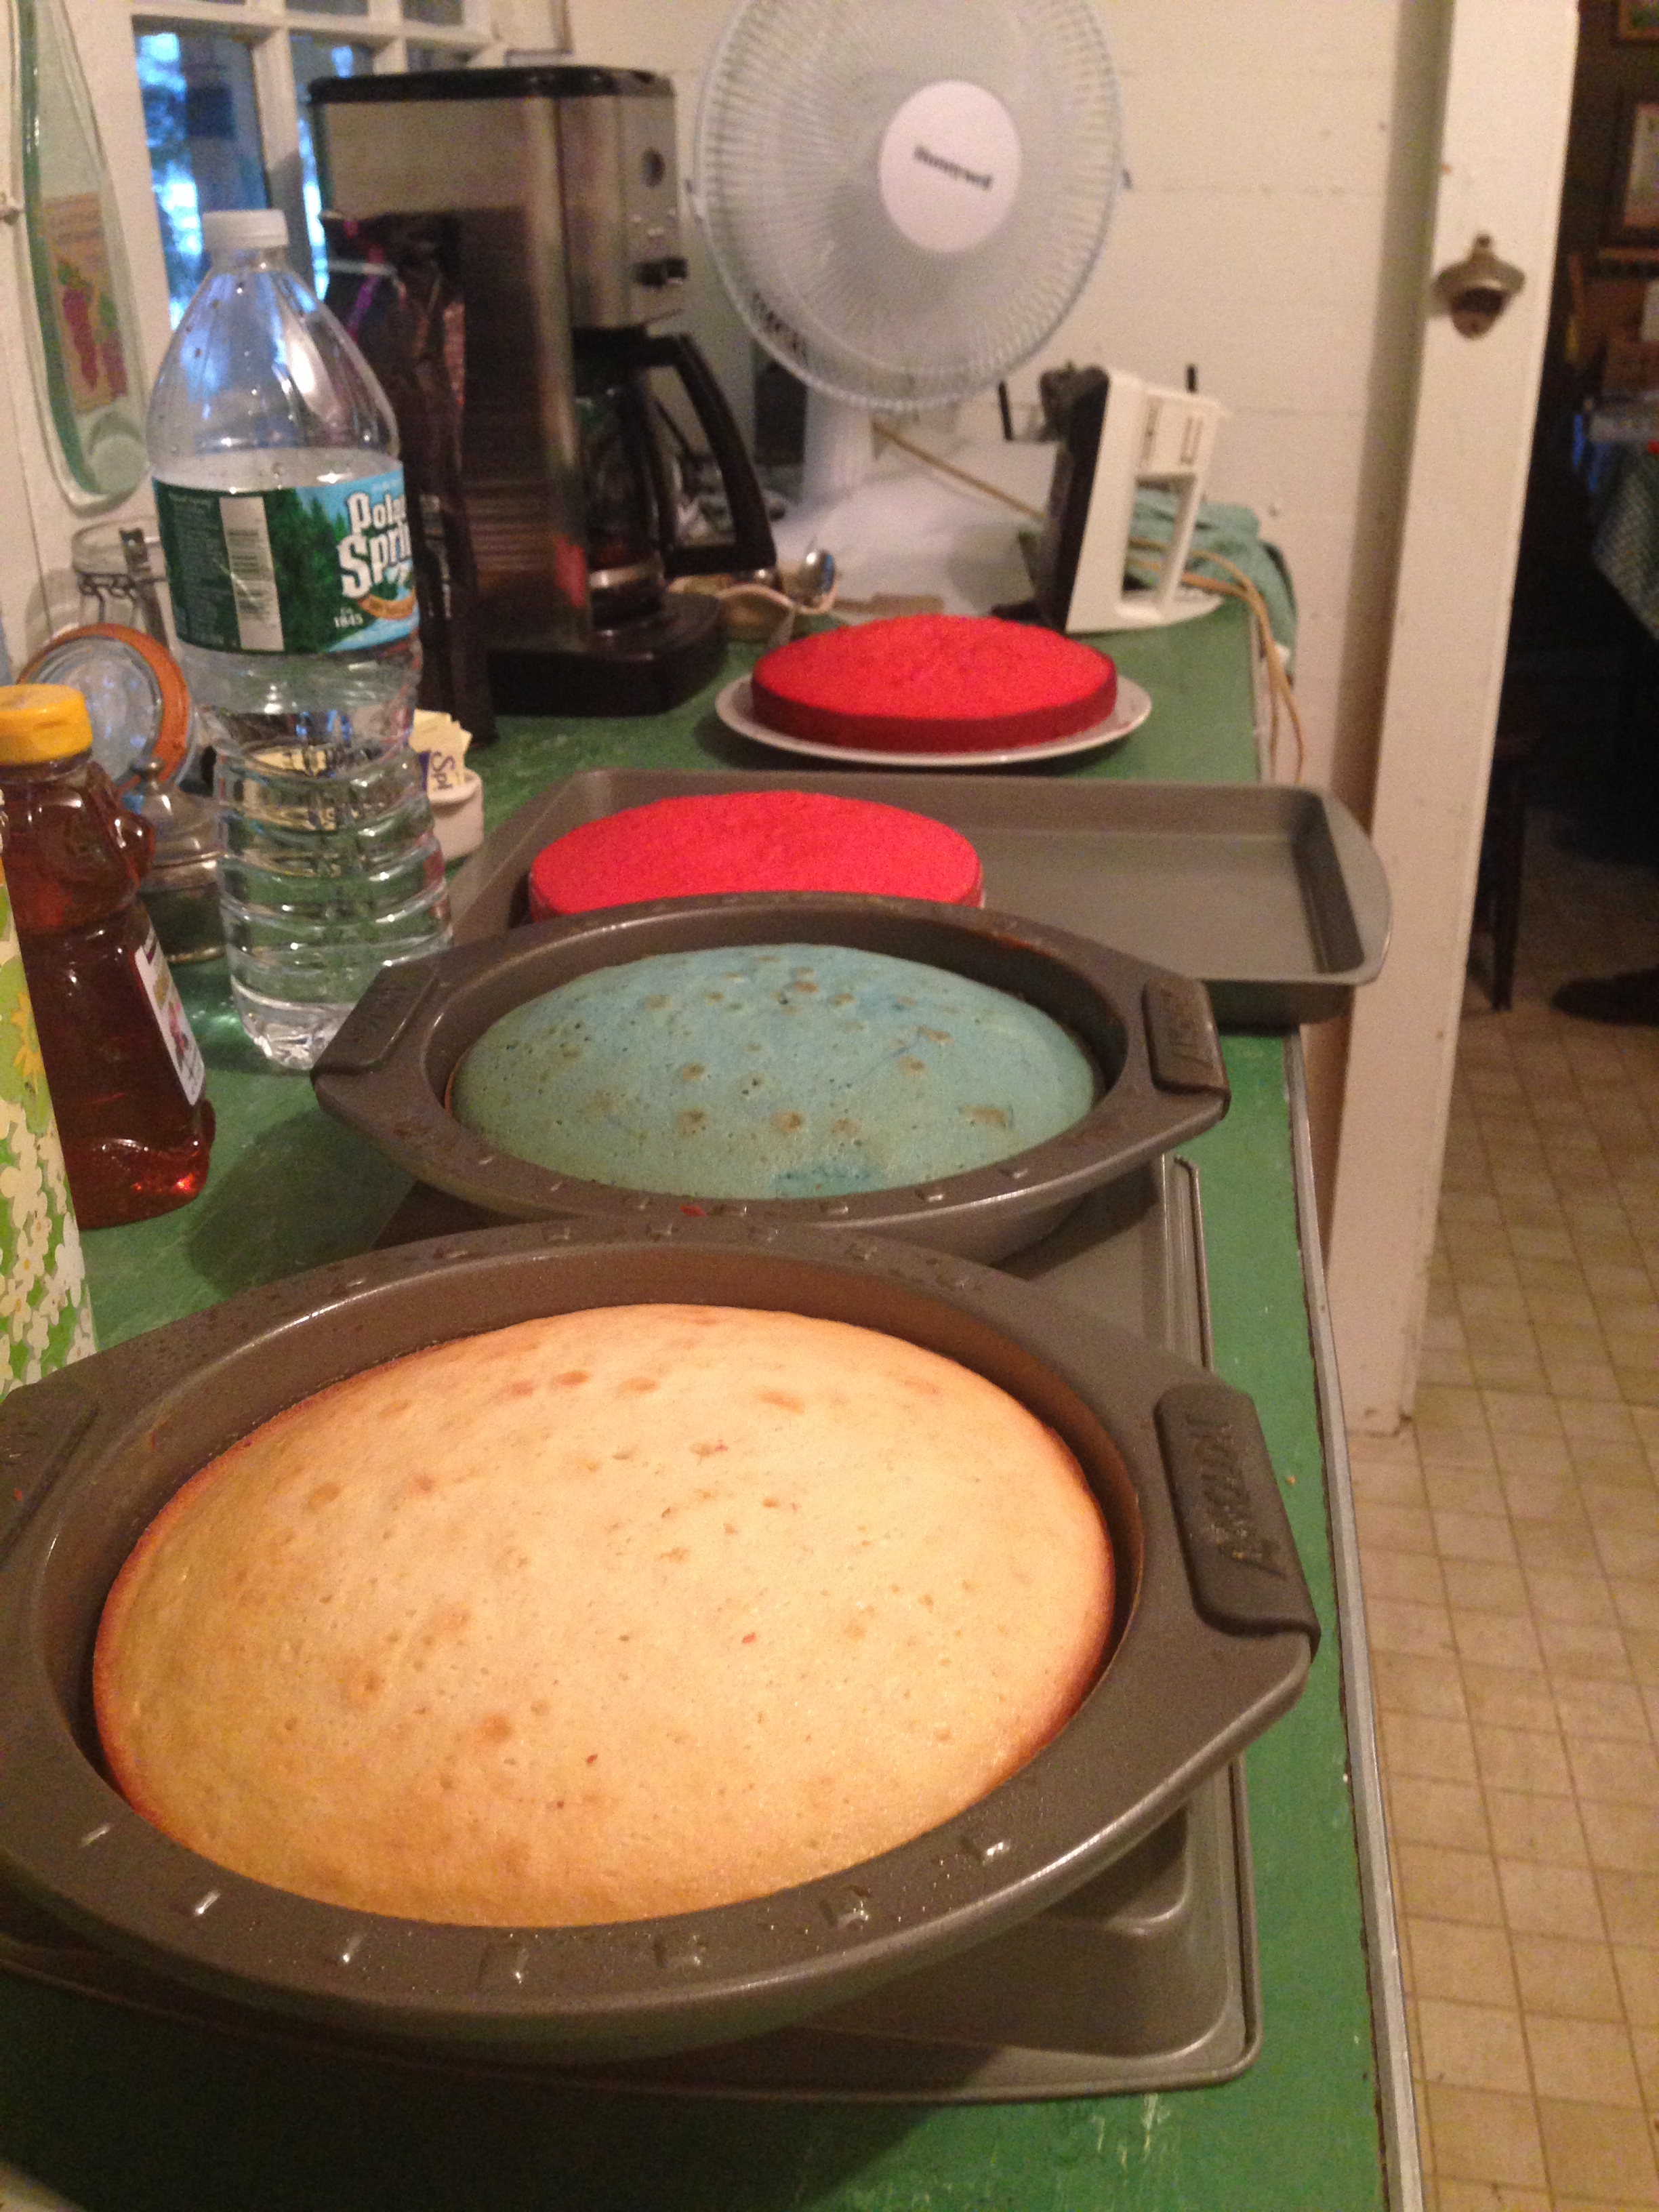 You can make 1 red cake larger than the other because what you really need is 3 layers of red.Let the cakes cool completely so that they are fully set up because you will need to handle them a lot and trust me you will be very sad if ones breaks because it was too warm.
The first step in assembling your cake is to cut the larger red layer in half. This can be scary, but the trick is to use 2 tools: a pairing knife and a large serrated knife. If possible, the serrated knife should be longer than the cake’s diameter so that you can see the knife on both sides of the cake while you are slicing it in half. Use the pairing knife to cut a guide line that will divide your cake into two even layers. Go around the cake with the knife, but don’t worry about cutting into it to deeply. Next, follow the guidelines using the serrated knife and cut straight through the cake. It may be easier to do this with a second person to watch the far side of the cake. Here is a video of the process dubbed in English!
Gently place 2 hands in between layers and lift the top layer off and set aside. Place bottom layer of red on your cake stand and top with a thin layer of frosting.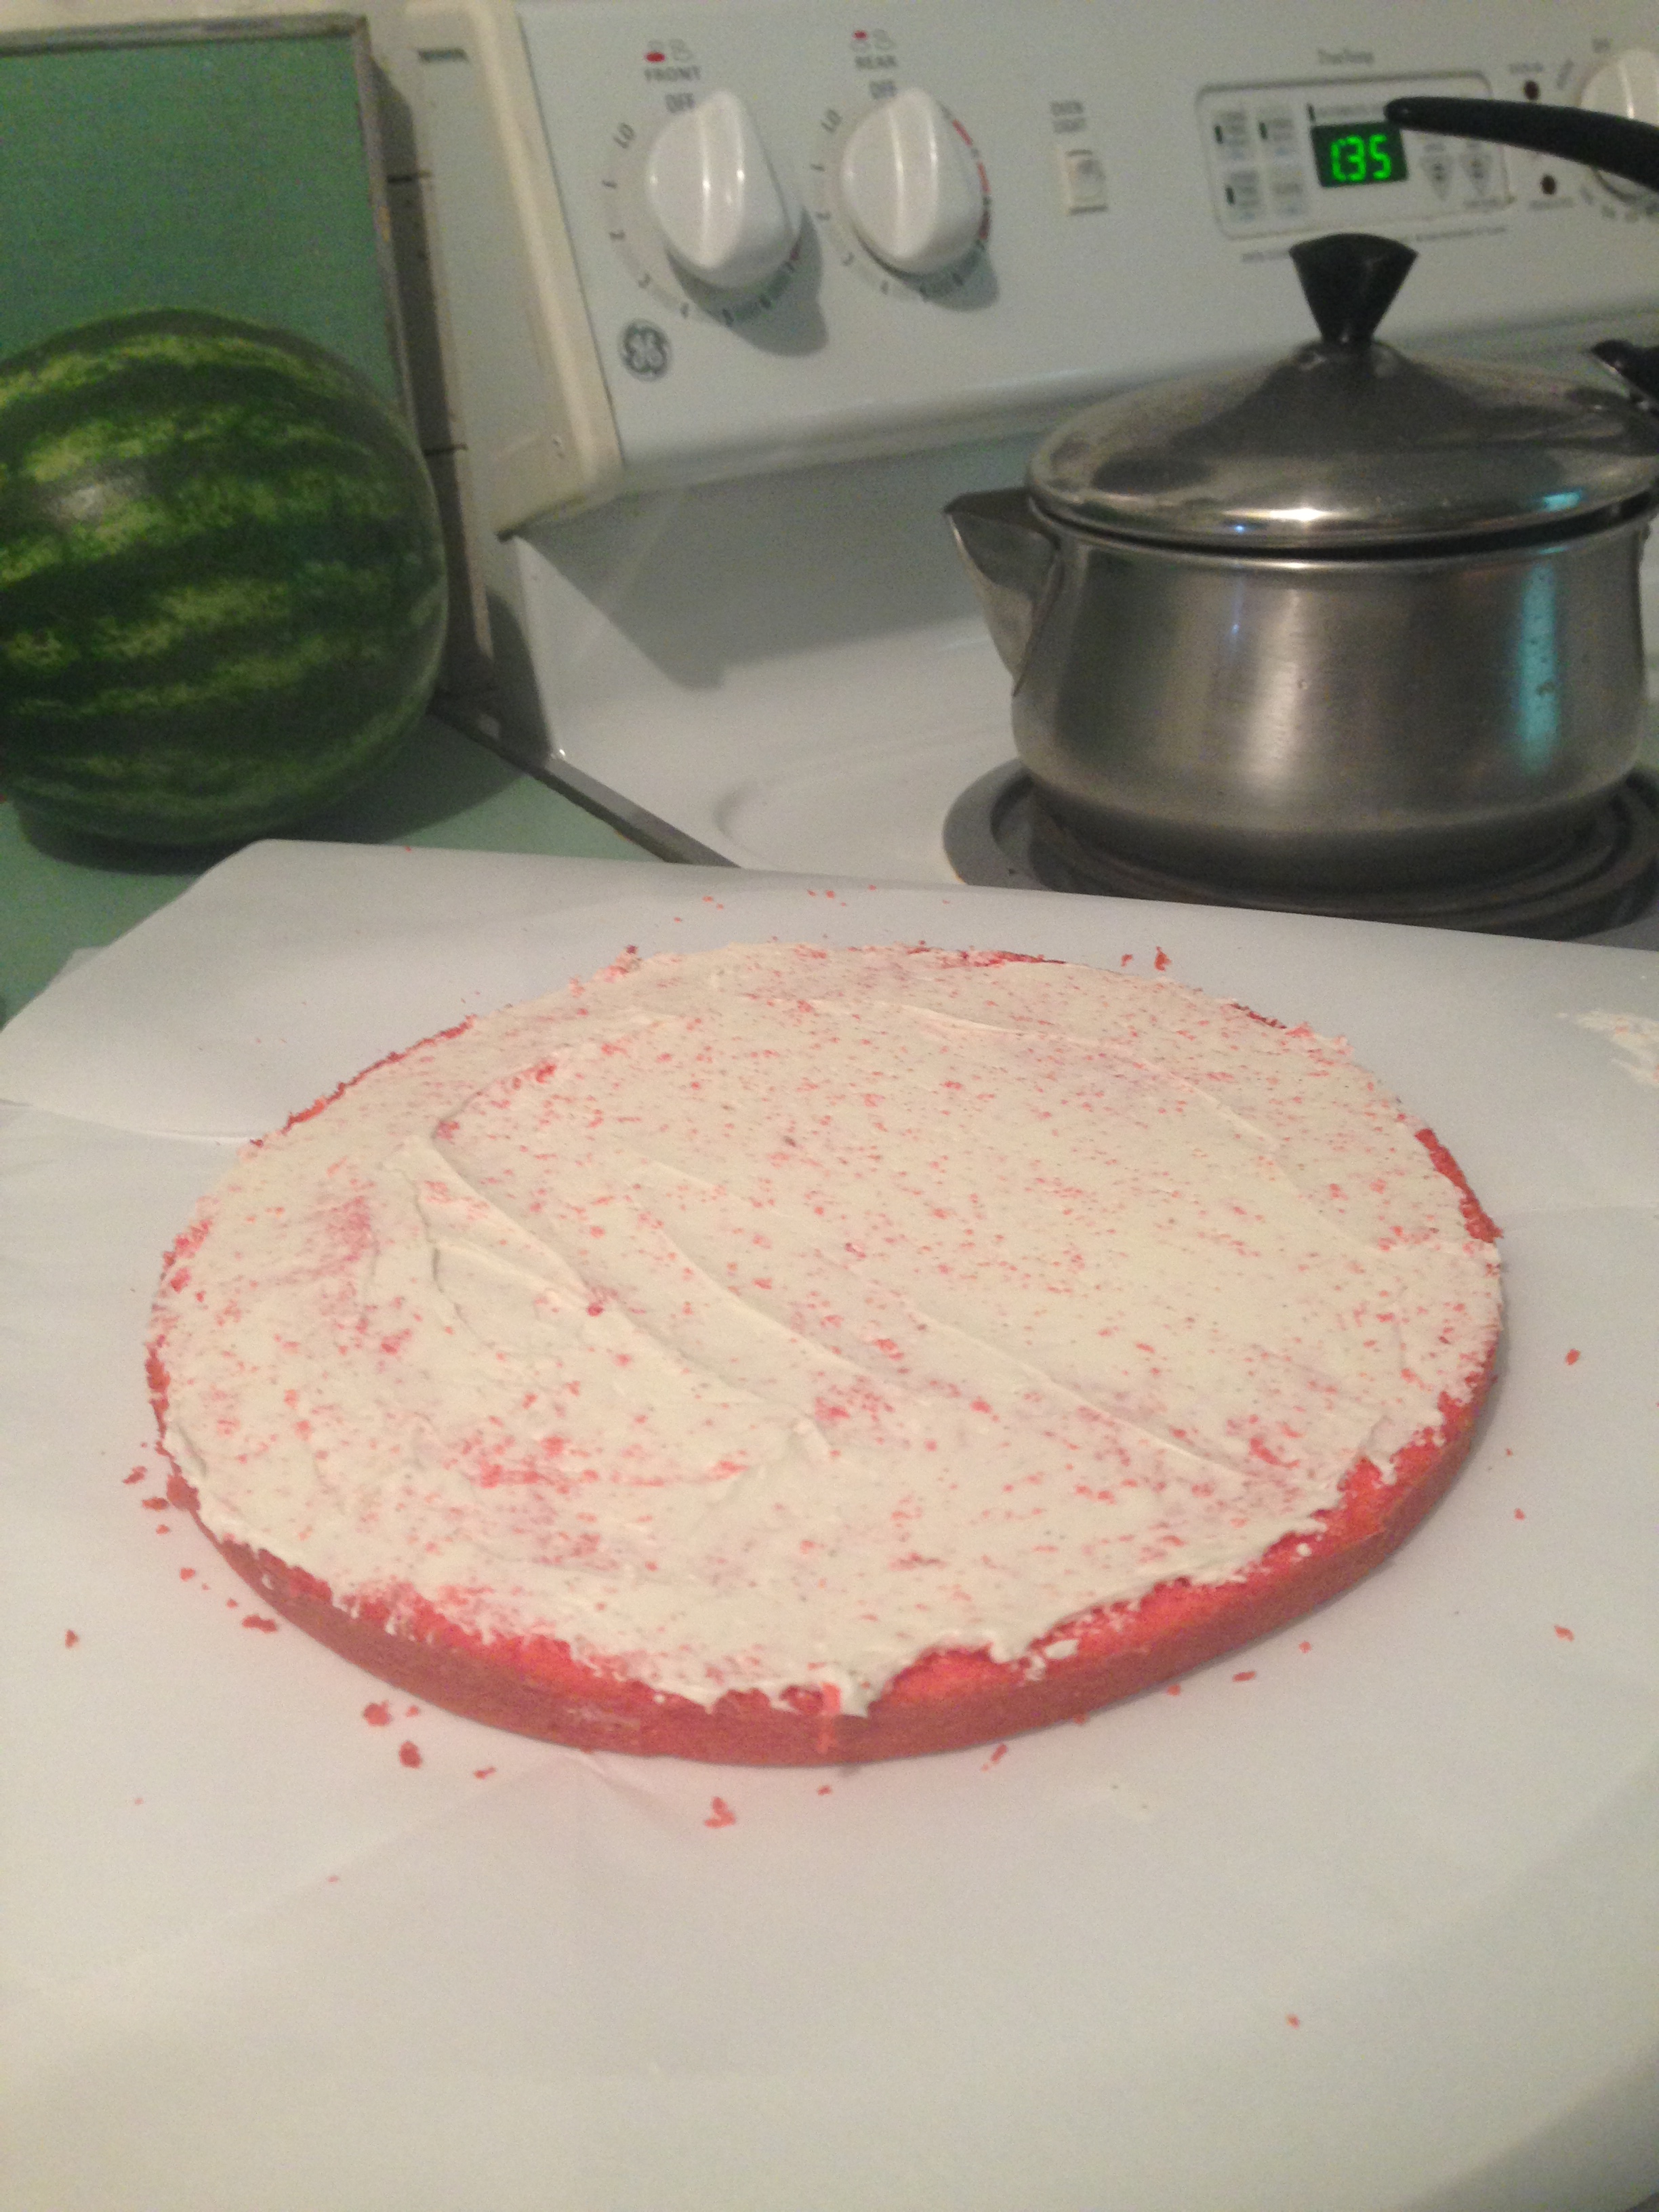 Repeat this process with white cake and then second half of red cake. You should now have 3 layers of cake and 3 layers of frosting (red, white, red).
  Now it’s time for the blue. Do not cut this layer in half. What you need to do is remove the center of the cake. I did this using a large ramekin as a size guide.
 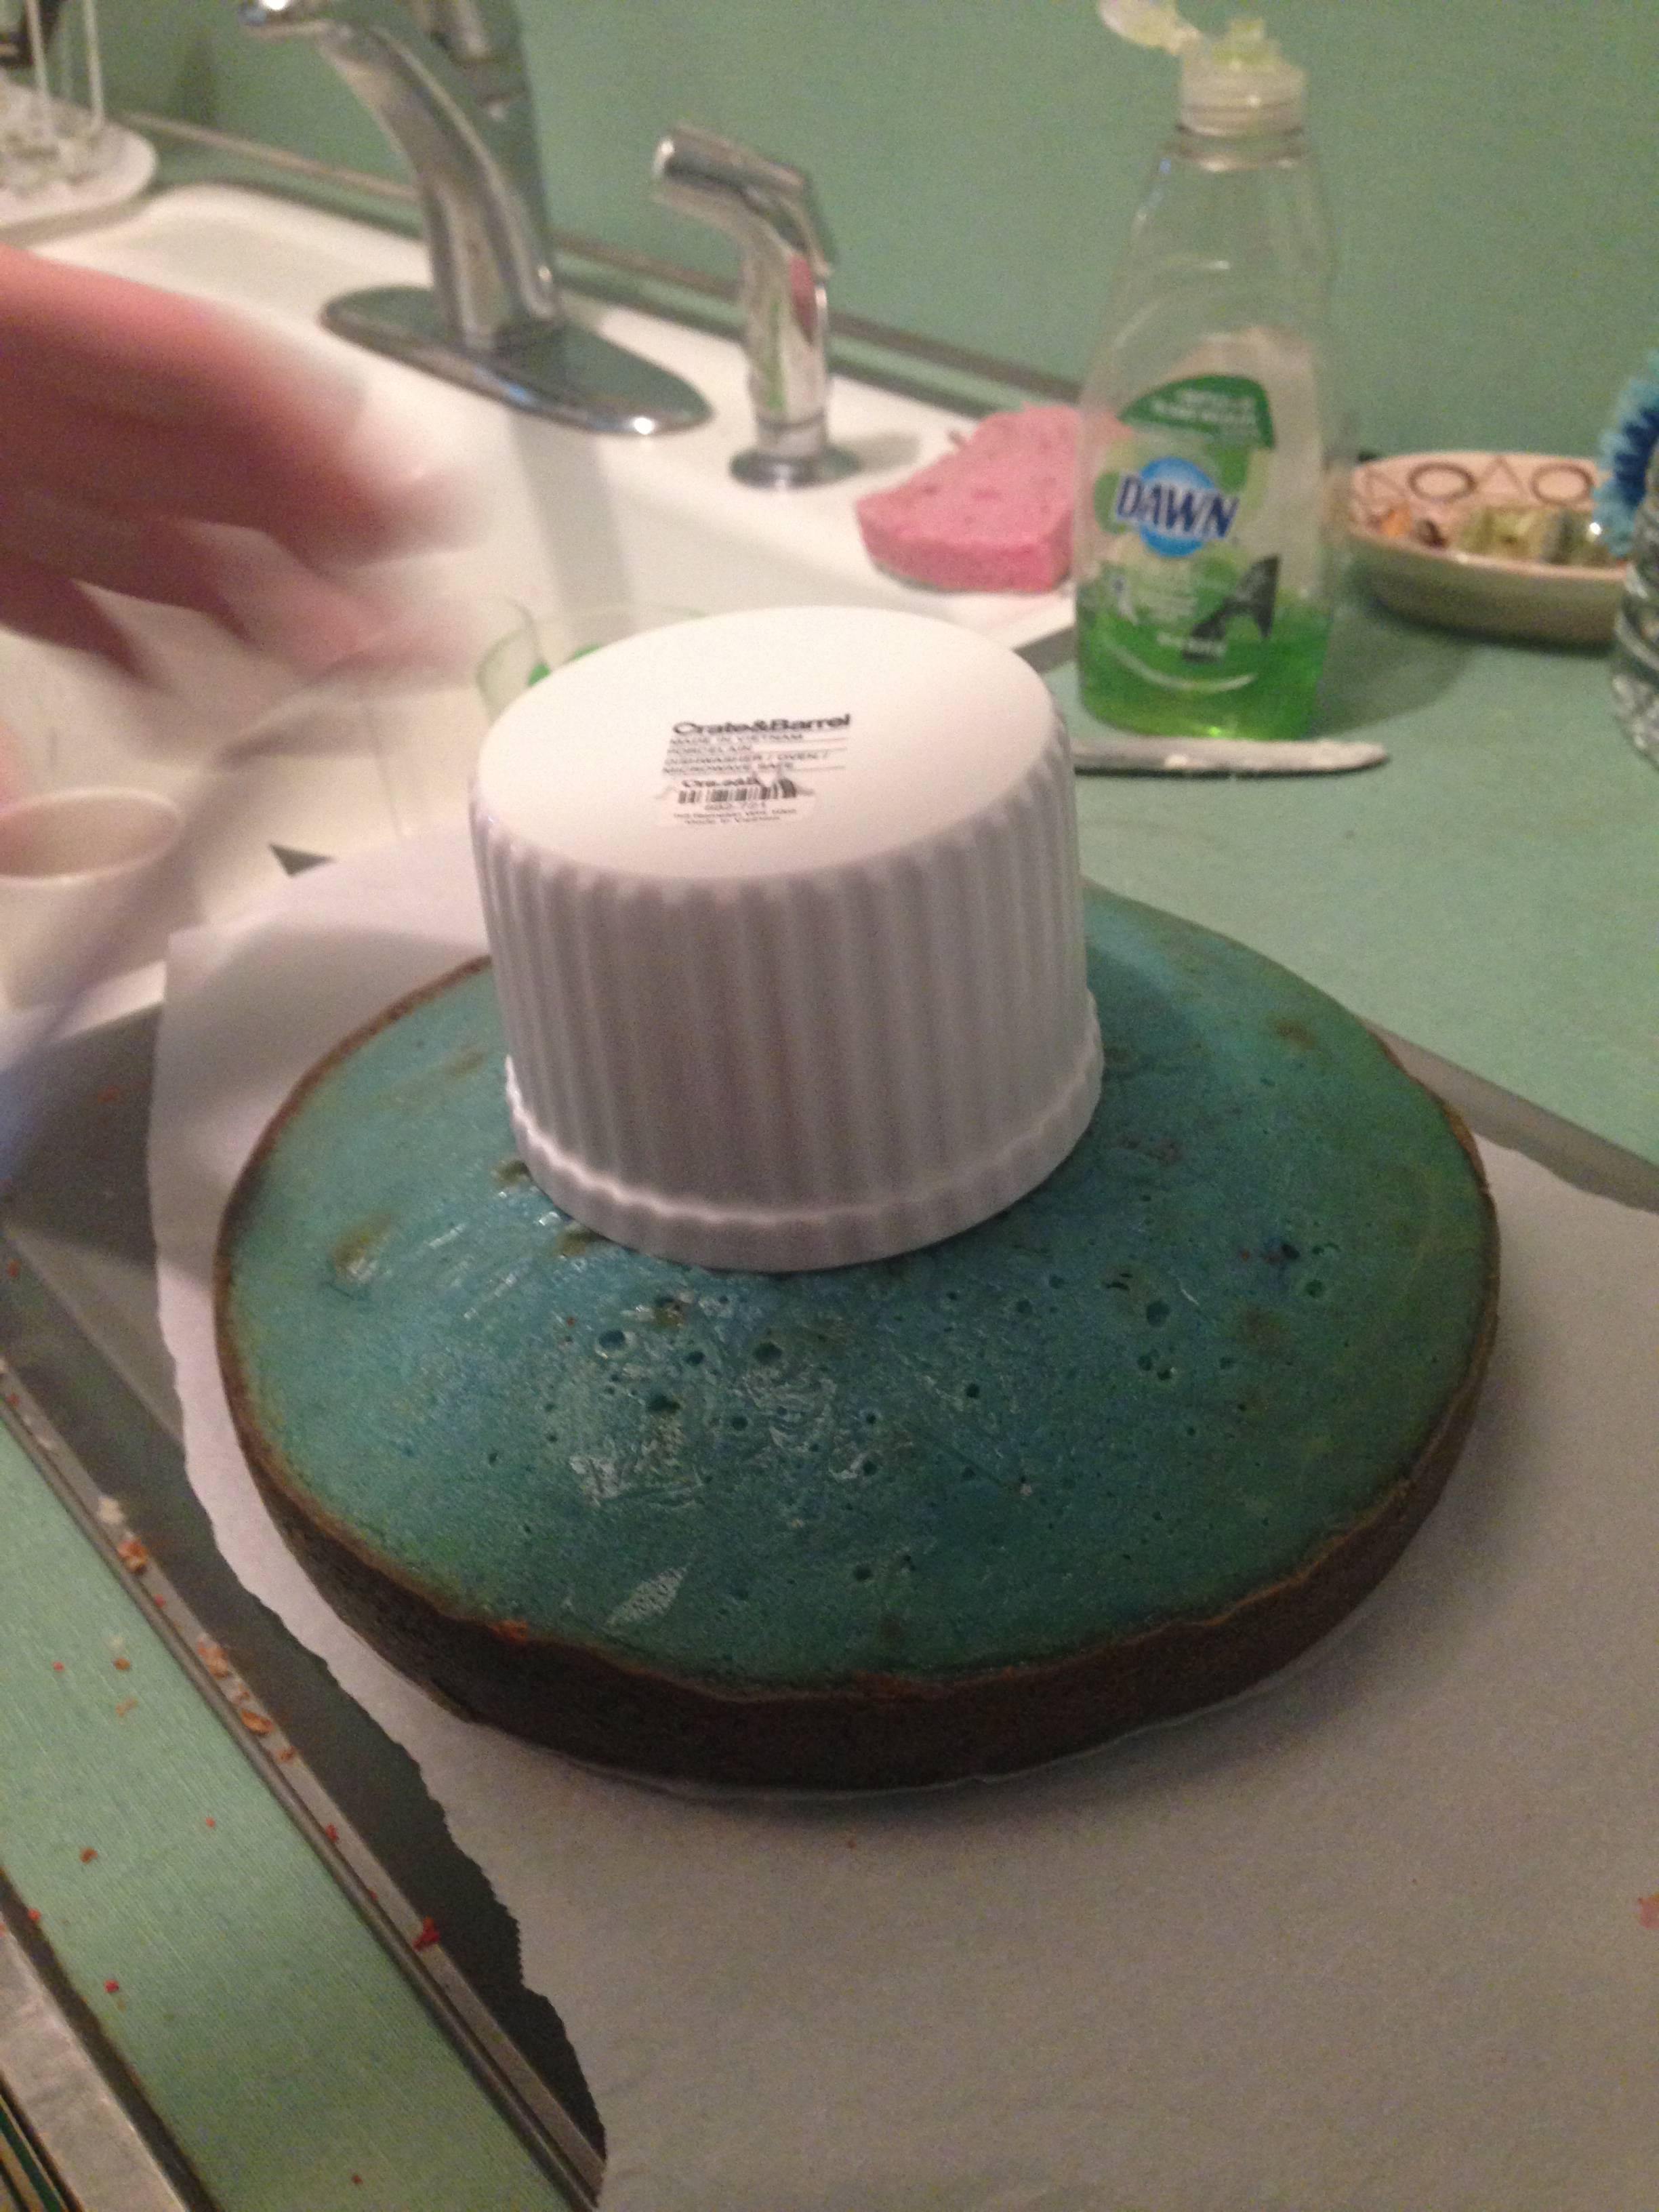 Place the outer ring of the blue on top of the cake.
 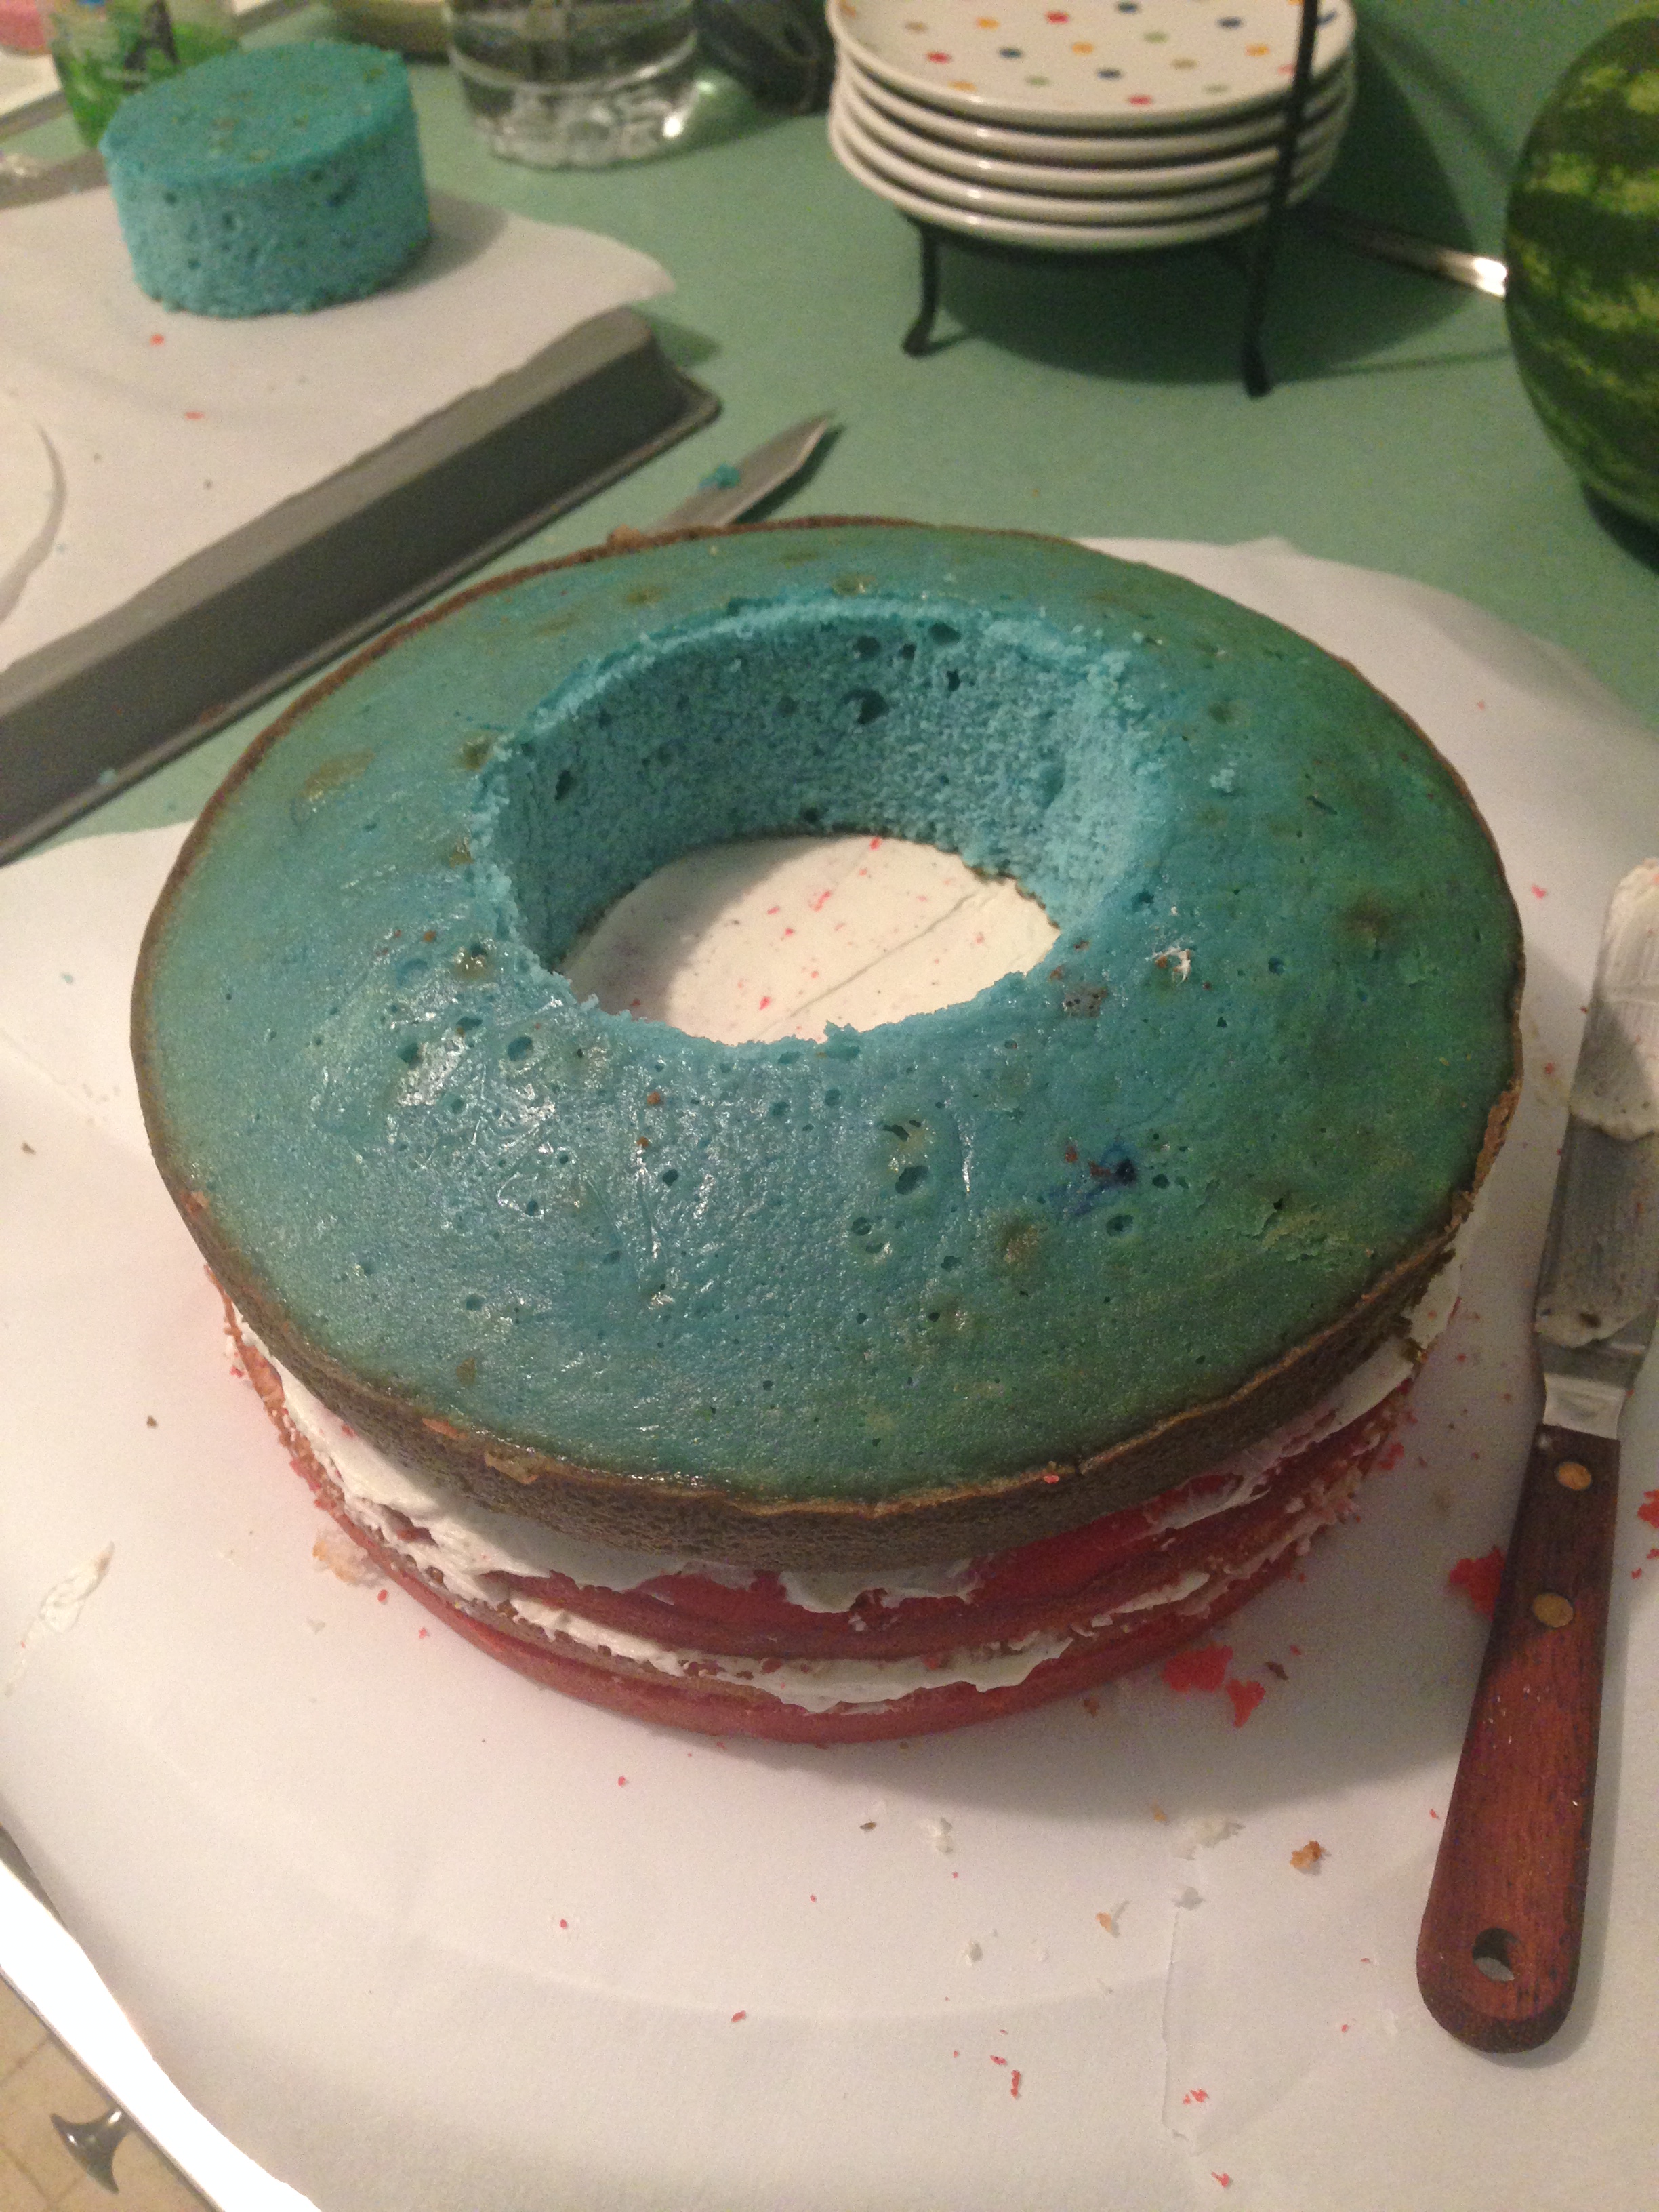 Add a thin layer of frosting around the inner ring of the blue cake. (Not pictured because this was not done… learning for next time!) Using the same ramekin, cut circles out of the white and red cakes, and gently add the white cake inside the blue circle. Top with frosting and then red cake.
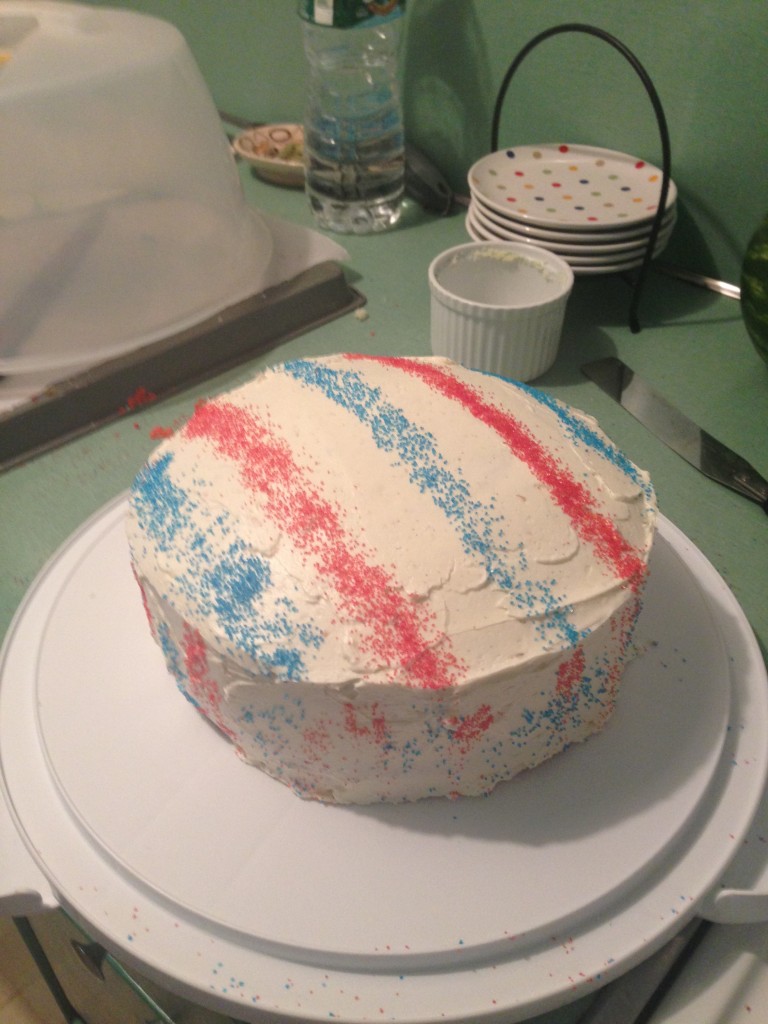
 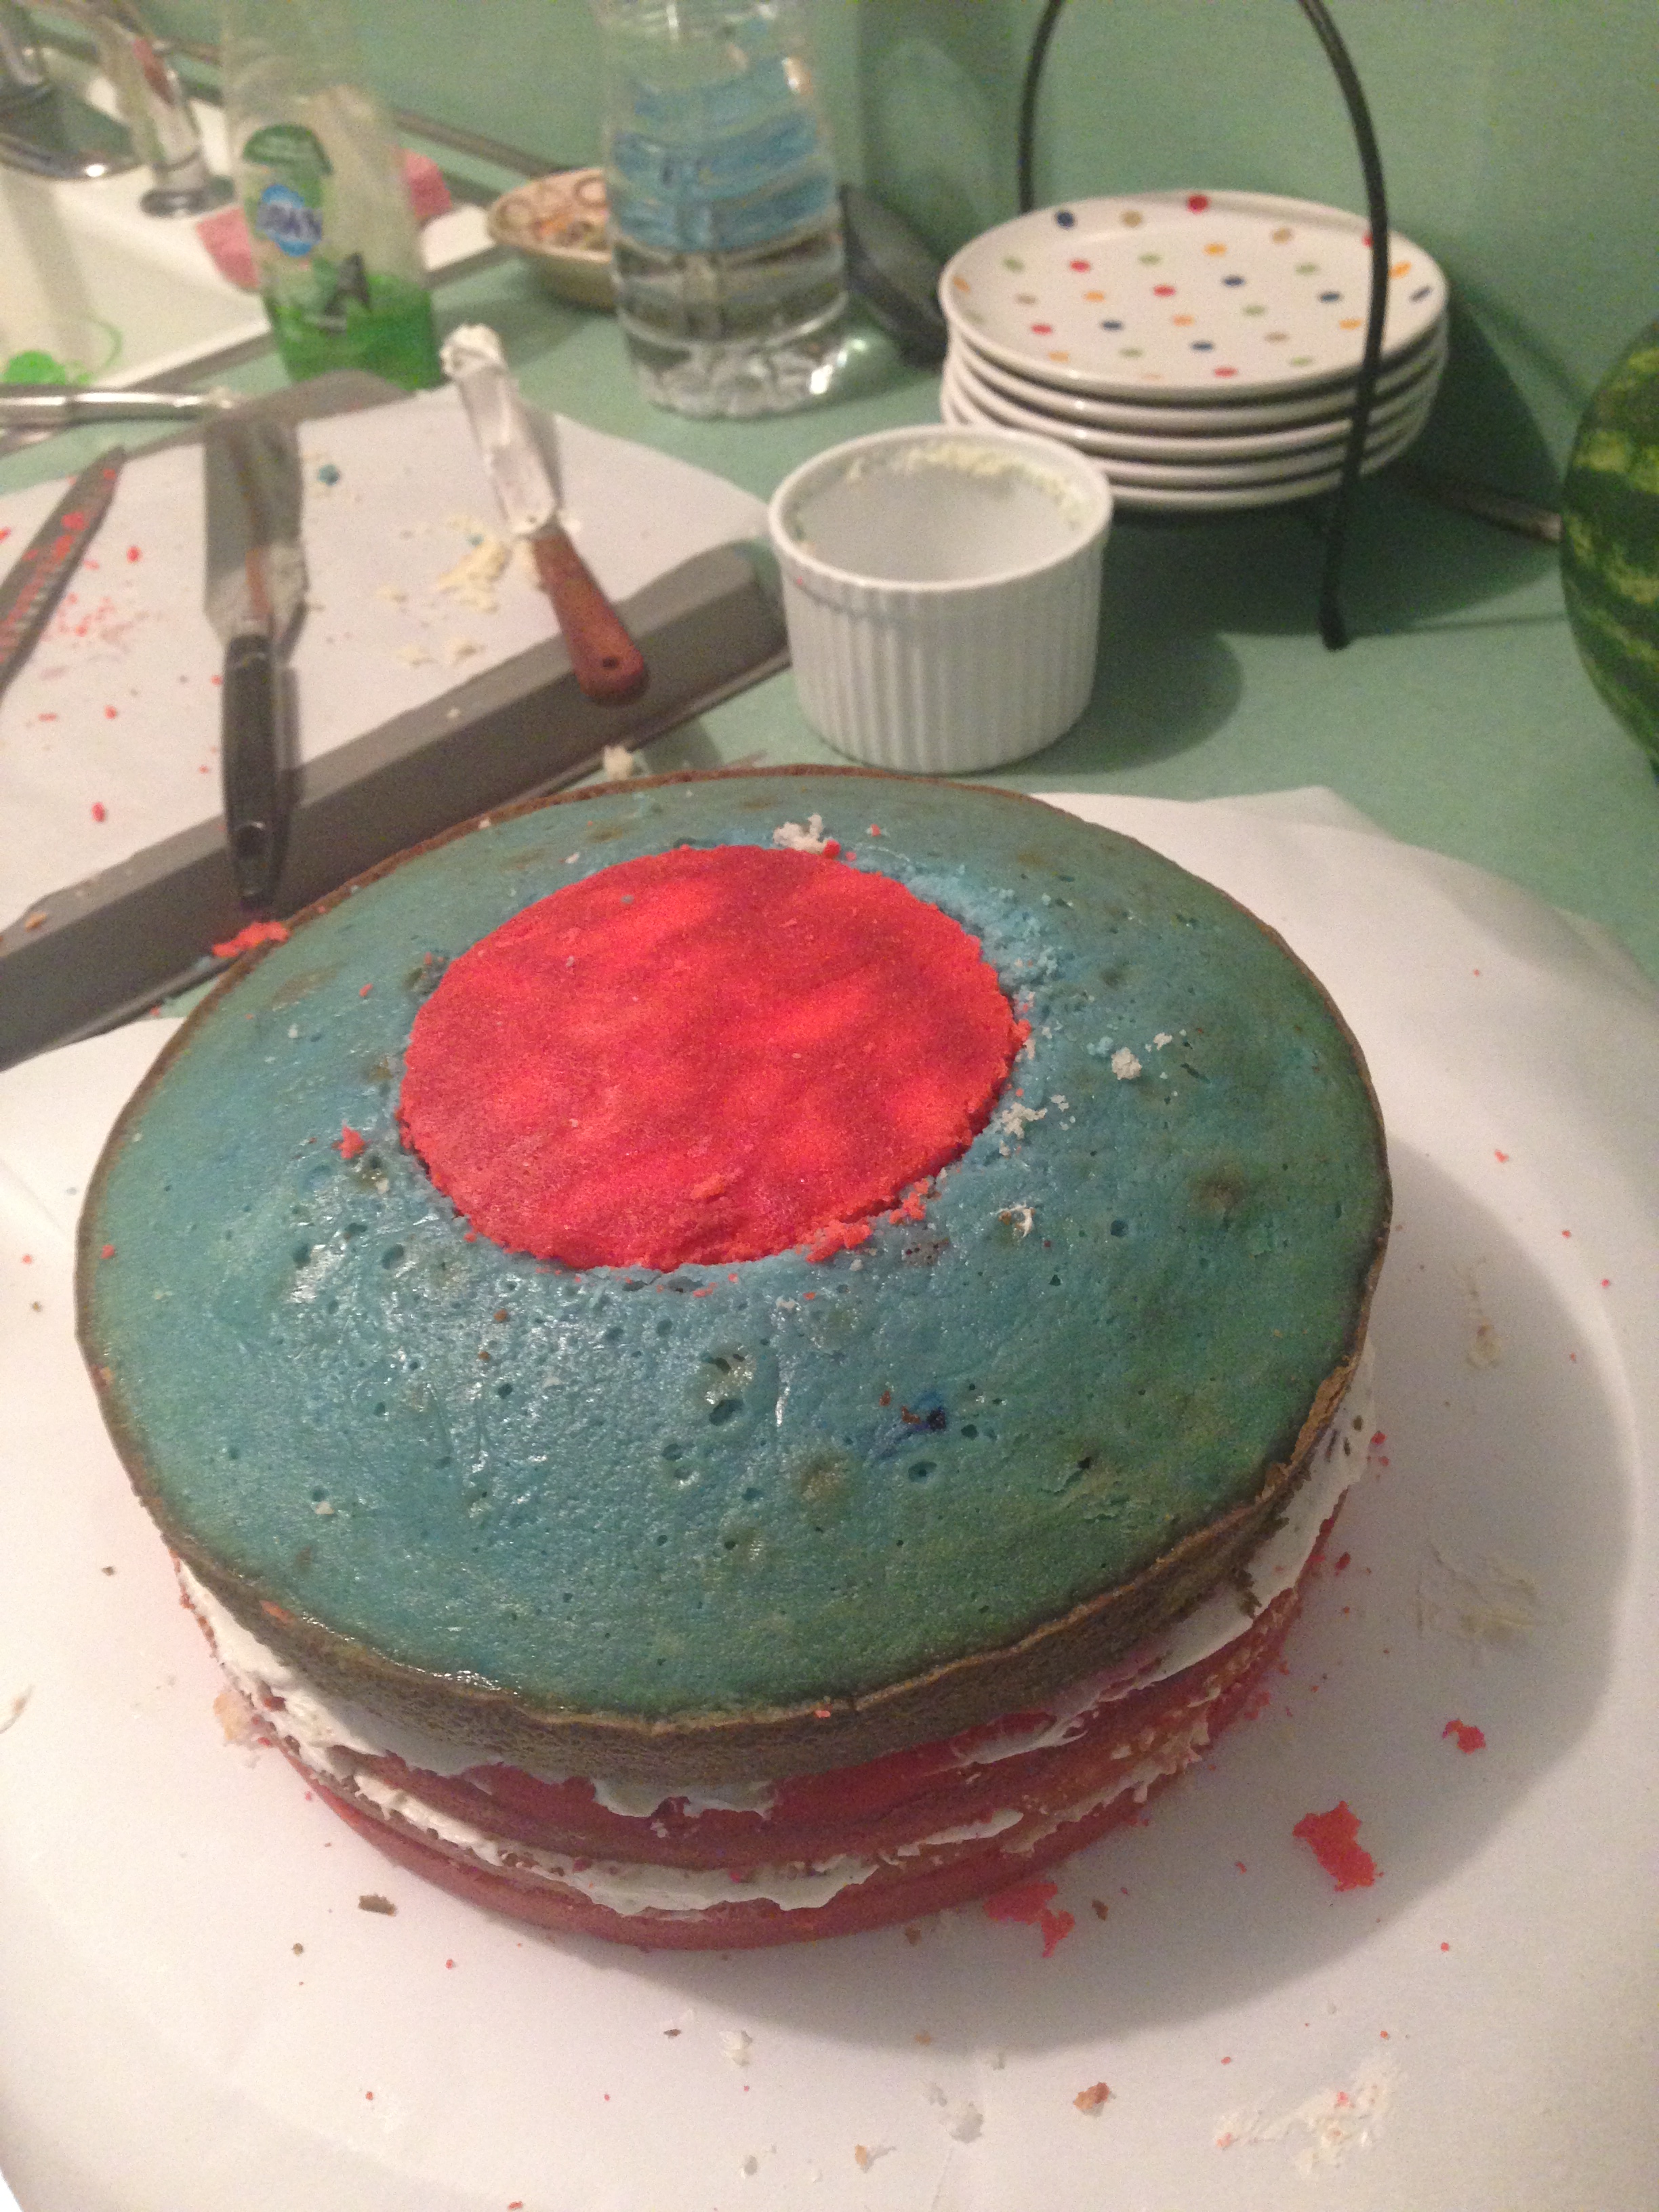 You may need to trim the edges off the white and red cake to let them fit inside the blue circle. This seems like a crazy puzzle but hopefully the pictures help illustrate this a bit better. Finish the cake by frosting it and decorating as you prefer.You may want to first frost with a very thin later of frosting and refrigerate for 20-30 minutes to set. This is called the crumb coat. It’s job is to lock in all the crumbs so that your final layer of frosting is nice and white. Our frosting has vanilla beans in it, so a real crumb coat isn’t fully necessary, but still is nice. I decorated the cake with blue and red sprinkles. Very festive, yet unassuming.
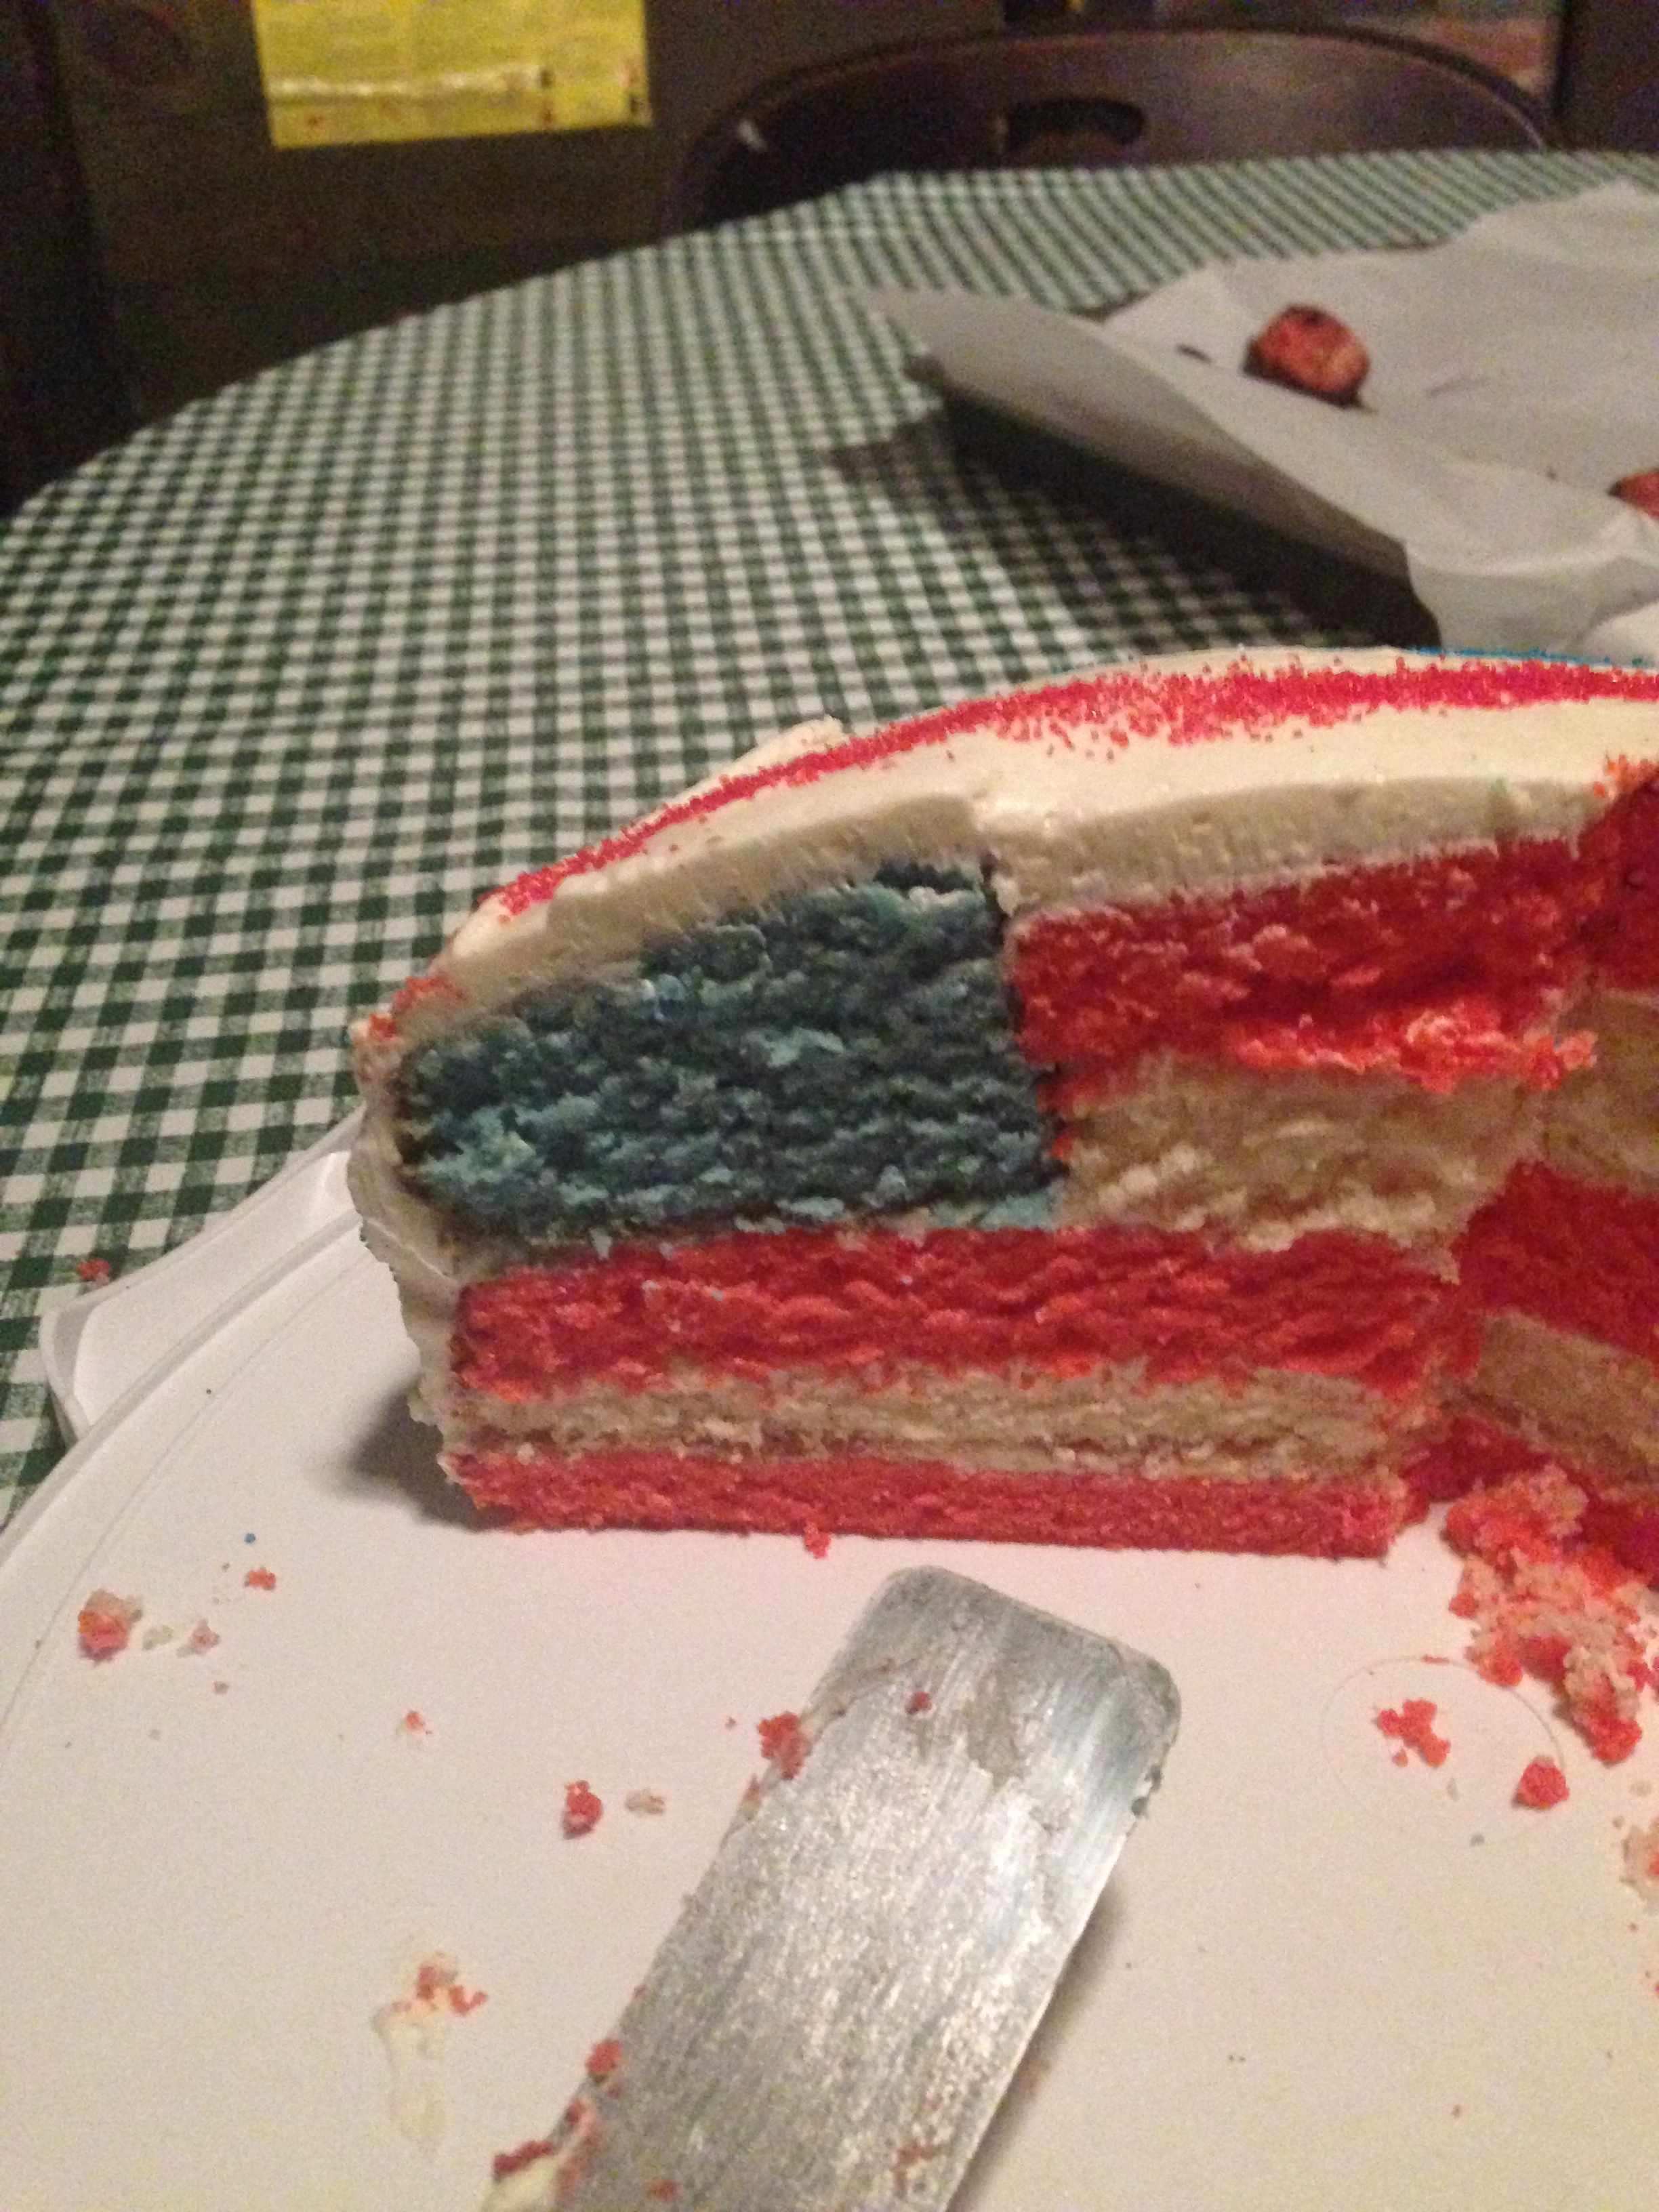
The last step is to gather your audience around, slice into the cake and pull out your slice to reveal the beauty inside… A FLAG!!! If you are celebrating this weekend, make this! If not, bookmark this post and impress everyone you know next year! Happy 4th of July!
PS- you will end up with A LOT of extra cake… I suggest making cake balls!
